Creating custom templates in Straico can significantly enhance your AI workflow by allowing you to craft reusable prompts tailored to your specific needs. In this tutorial, we’ll walk you through the process of creating a template, using an Academic Topic Summarizer as our example. Let’s get started!
Templates in Straico empower you to streamline your tasks by saving time and ensuring consistency across your projects. Whether you’re a marketer, entrepreneur, or AI enthusiast, mastering template creation opens up a world of possibilities.
Table of Contents
ToggleStep 1: Access Template Creation
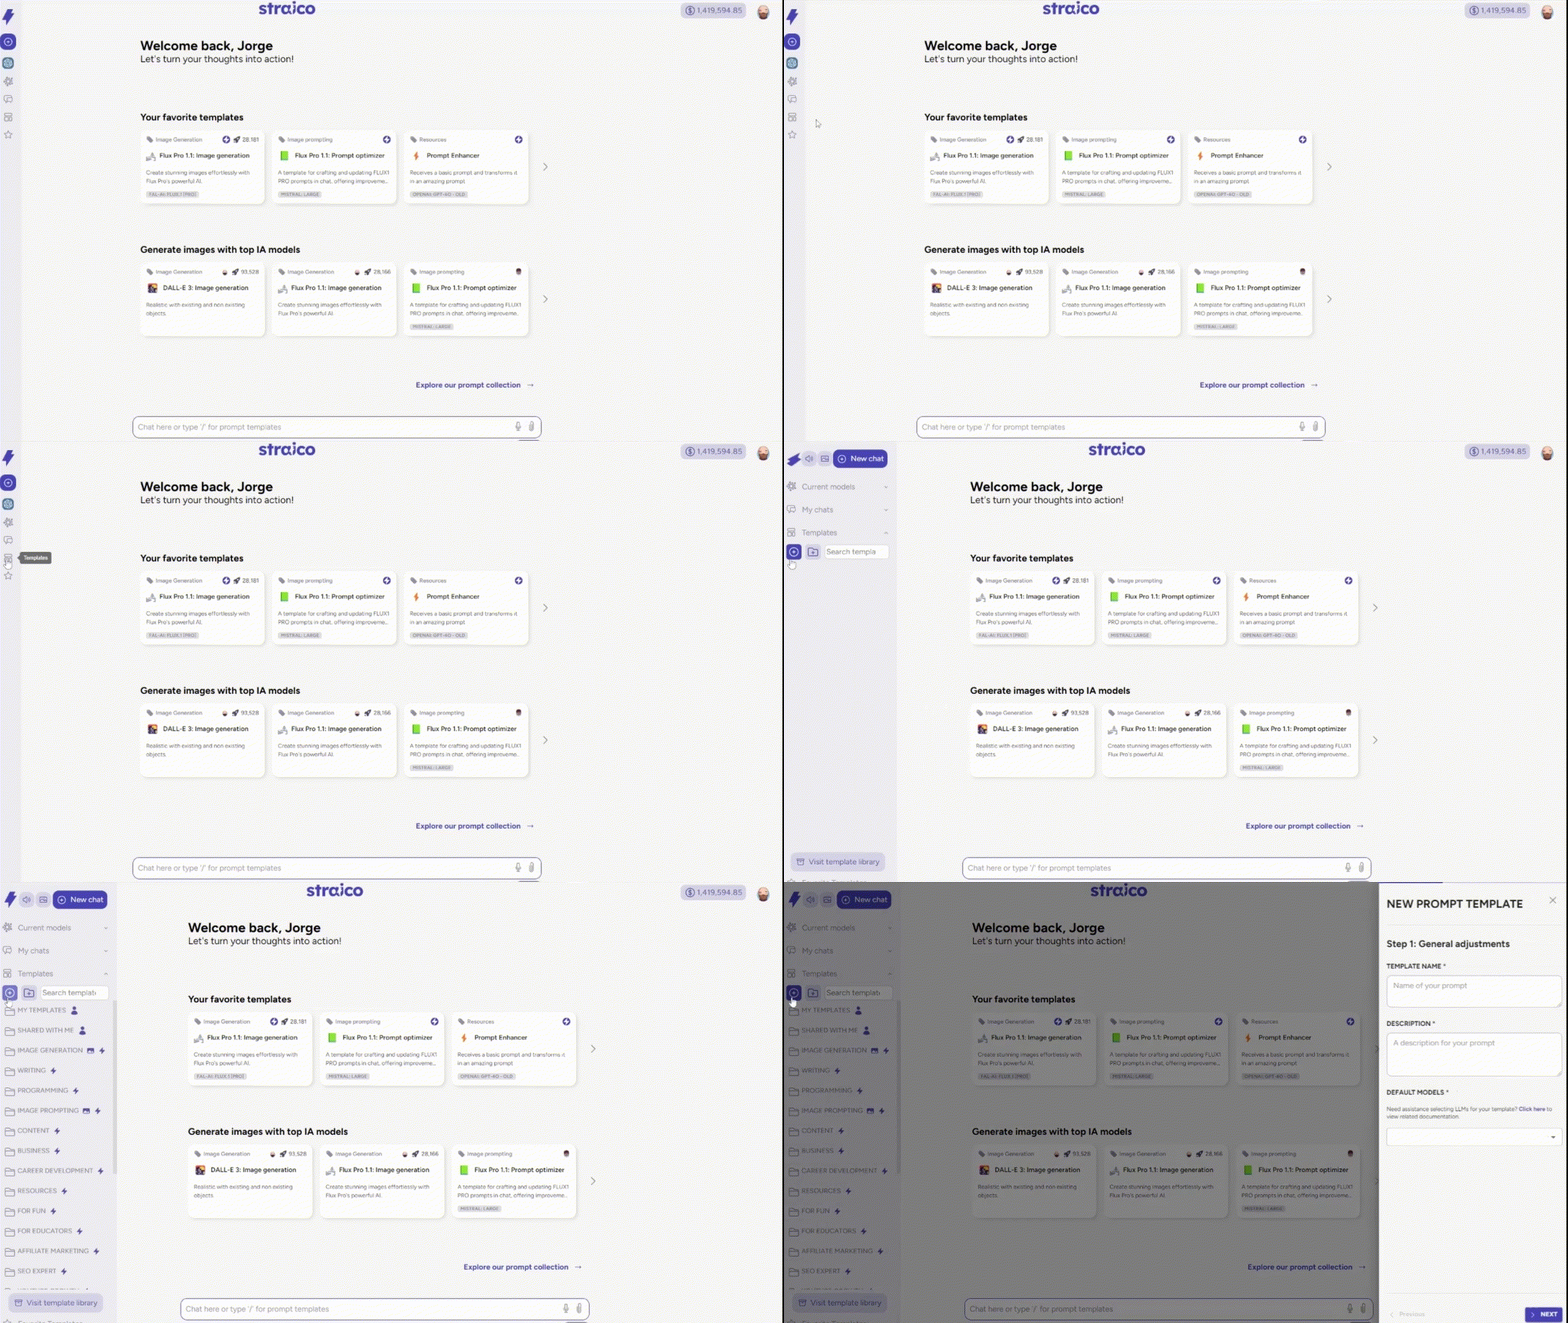
Navigate to Templates
Begin by locating the Templates icon on the left sidebar of your Straico workspace. Clicking on this icon takes you to the Templates area, where all your custom templates reside.
Initiate Template Creation
Once in the Templates area, click on the Plus (+) icon. This action opens a new window where you’ll start crafting your new template.
Step 2: General Adjustments
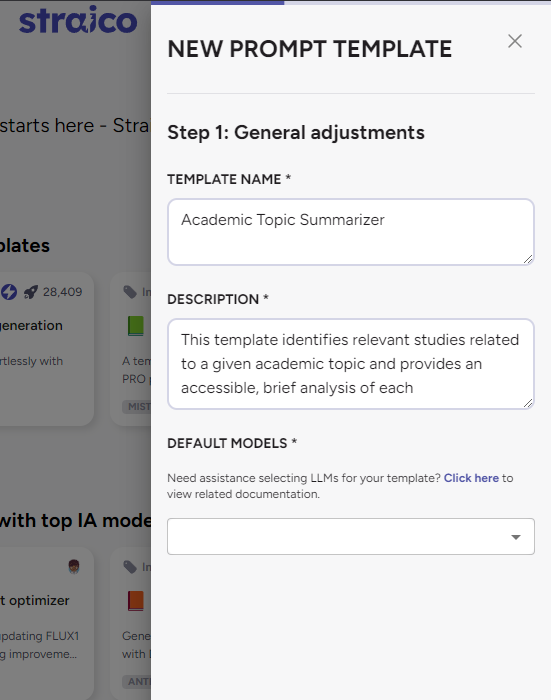
Name Your Template
Assign a distinctive name that reflects the purpose of your template. For our example, we’ll call it “Academic Topic Summarizer.” This name will help you and others identify the template’s function quickly.
Provide a Description
Add a brief description outlining what your template does. For instance: “This template identifies relevant studies related to a given academic topic and provides an accessible, brief analysis of each.”
This description helps users understand the template’s functionality at a glance.
Step 2.1: Choose the Default Models
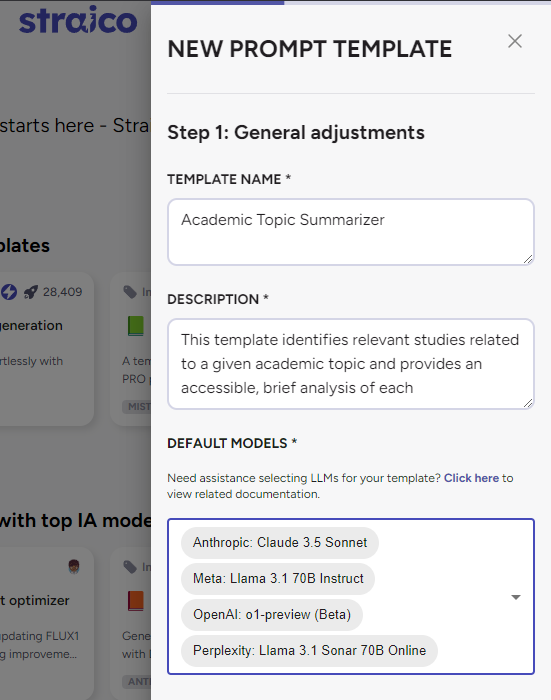
Select Default Models
Straico allows you to choose up to four generative AI models that best suit your template’s objectives. For our Academic Topic Summarizer, we’ll select:
- Claude 3.5 Sonnet – A fan favorite known for its versatility.
- Meta Llama 3.1 70B Instruct – Excellent for document summarization tasks.
- OpenAI o1 Preview – Offers robust reasoning capabilities, enhancing analysis depth.
- Perplexity Llama 3.1 Sonar 70B Online – Excels in complex search and data synthesis.
Each model brings unique strengths, ensuring comprehensive and high-quality outputs.
Step 3: Attachments
Attach Relevant Files
Although optional, attaching files can provide additional context for your AI models. You can upload images or documents that will be automatically positioned at the beginning of your prompt.
For this example, we’re not attaching any files. However, if you have materials like an initial dissertation or research document, attaching it could enrich the AI’s responses by providing more in-depth context.
Step 4: Prompt and Variables
Craft Instructions
Now, it’s time to write detailed instructions that define how your template should function. Clear and specific instructions guide the AI models to produce the desired outputs.
Incorporate Variables
Variables make your template dynamic and adaptable to different inputs.
Text Variables
- Define Variable Name: Assign an easy-to-reference name like “topic.”
- Set Placeholder: Place “Desired Topic” this can be used to give a bit more of guidance to the one using the template.
- Limit Characters: Specify the maximum character count for user input (up to 100,000 characters).
Note: You can insert the same variable multiple times in your prompt if needed.
Example:
“As an AI language model, analyze the following {{topic}}. Summarize key studies and provide insights in an easily understandable format.”
Dropdown Variables
- Define Variable Name: Name your dropdown variable, such as “citation.”
- Add Options: List the selectable options, e.g., APA, MLA, IEEE.
This allows users to choose their preferred citation style, adding flexibility to the template.
Step 5: Review
Before finalizing, review your template to ensure everything is in place:
- Models: Confirm that all selected AI models are listed correctly.
- Prompt and Variables: Check that your prompt is clear and that variables are properly integrated.
Step 6: Template Location
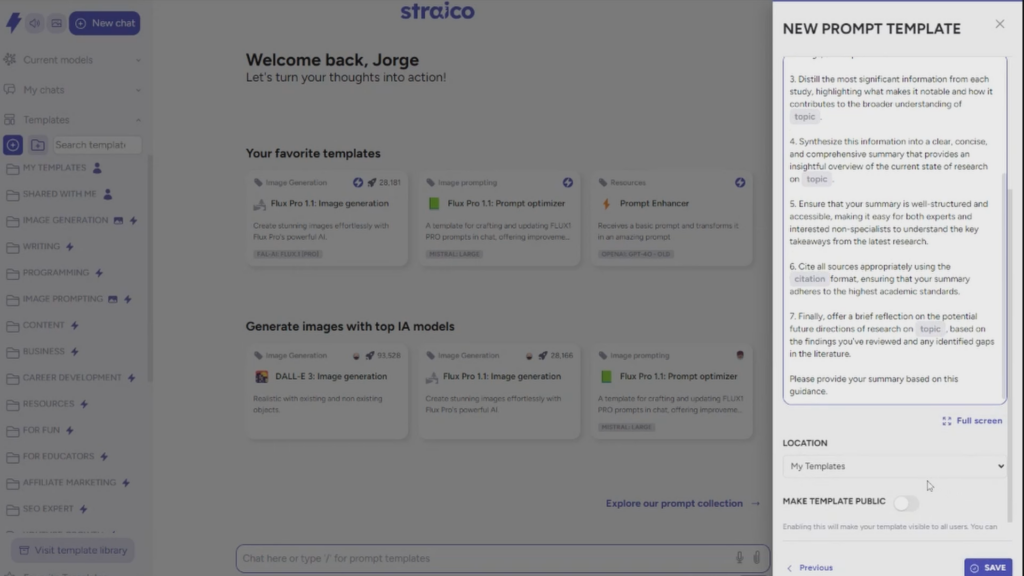
Choose a Folder
Decide where you’d like to save your template. You can select a specific folder for better organization.
For this example, we’ll keep it in the default “My Templates” folder.
Step 7: Public Availability (Optional)
Make Your Template Public
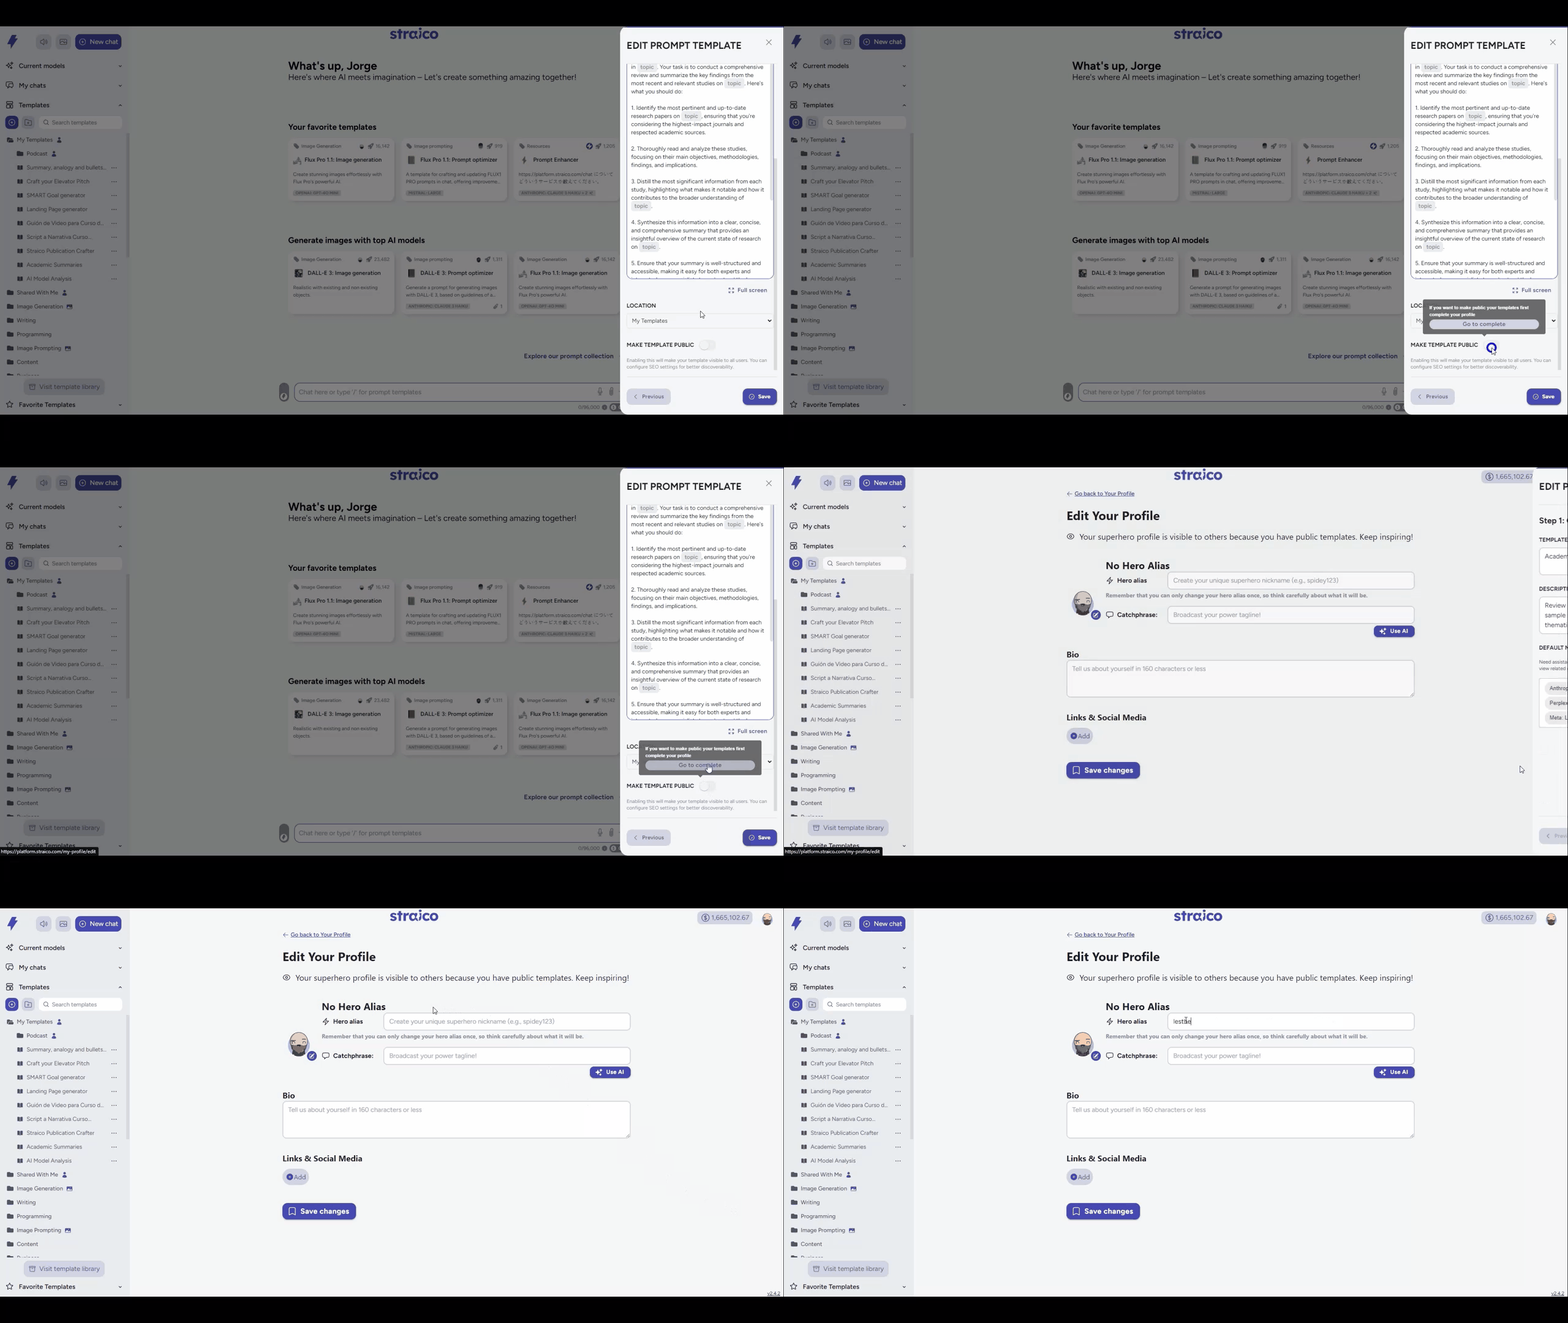
Before you share your template with the Straico community, ensure your public profile is complete. This includes:
- Alias: Choose a unique name that represents you or your brand.
- Catchphrase: Create a memorable tagline that illustrates your personality or mission.
- Bio: Write a brief description about yourself or your business.
- Links: Optionally, add links to your website or social media profiles.
Make Your Template Public
This step is optional but allows you to share your template with the entire Straico community.
- Fill in SEO Details:
- Title: Provide a clear and concise title.
- Description: Write a brief summary of your template’s purpose.
- Slug: Create a simple and readable URL slug (e.g., “academic-topic-summarizer”).
- Keywords: Include relevant keywords like “academic summarizer,” “AI research assistant,” “citation styles.”
Generate SEO with AI: If you prefer, you can click the ‘Generate SEO with AI’ button to have the SEO details created and filled in for you.
Since you’ve just created the template, filling out these details should be quick and straightforward.
Once your template is public, you’ll find it in the Template Library, along with all other templates created by Straico and the community. After a few days, your template will also be indexed by Google, making it searchable via Google search results.
By following these steps, you can effortlessly share your work with a broader audience and contribute to the vibrant Straico community.
Step 8: Use the Template
Access Your Template
Navigate back to your Templates area and locate your new template in the “My Templates” folder.
Start Using It
Click on your template to begin using it. Input your variables—for example, enter your research topic and select your preferred citation style—and let the AI models do their work.
Share with Others (If the template is public)
If you want to share the template with someone specific:
- Click on “Create Public URL” to generate a shareable link.
- Send this link to colleagues or friends who might benefit from your template.
- This is the direct Public URL to the Template we have been using as an example: https://preview.straico.com/share/tool/6723542777ffdcf5a9ad8810
That’s it!
You’ve successfully created a powerful, reusable template in Straico!
By harnessing the flexibility of templates, you can streamline your AI tasks and boost productivity.
Start exploring and creating more templates tailored to your needs. Whether you’re summarizing academic topics, generating marketing content, or drafting emails, Straico’s template feature has you covered.
Happy creating!
Straico provides seamless access to leading generative AI models for text, images, and audio—all in one unified workspace. Unlock your potential and transform the way you work with AI today.


