In the fast-evolving landscape of generative AI, efficiency is paramount for professionals looking to harness the full potential of their tools. Our latest feature, Smart Merge, empowers you to streamline their interactions with AI models, enhancing productivity and delivering superior results. Let’s dive into how to leverage Smart Merge for informed, coherent responses tailored to your needs.
Getting Started with Smart Merge
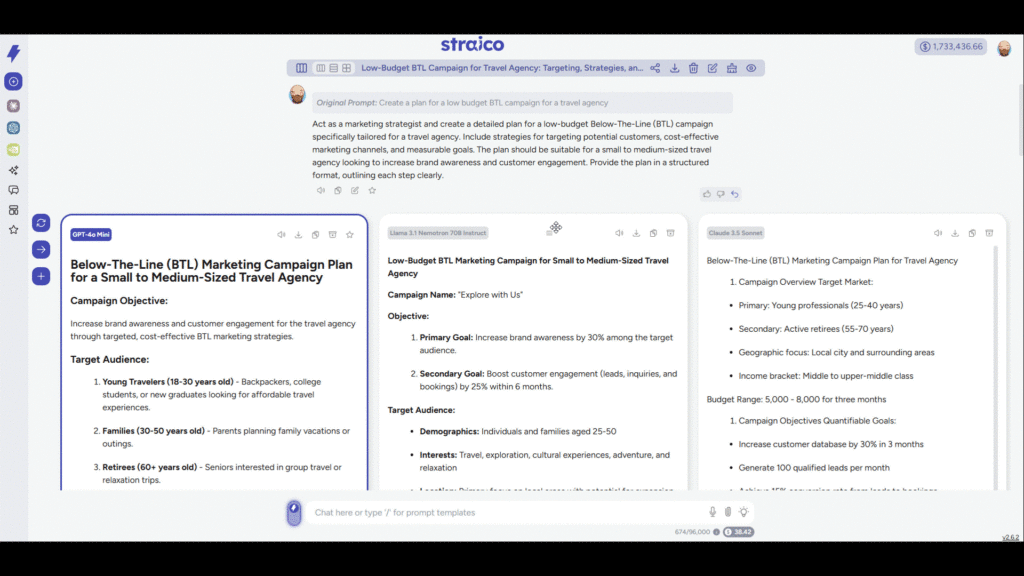
To embark on your Smart Merge journey, initiate a chat as you typically would, ensuring the side-by-side view is enabled.
New Feature Highlights:
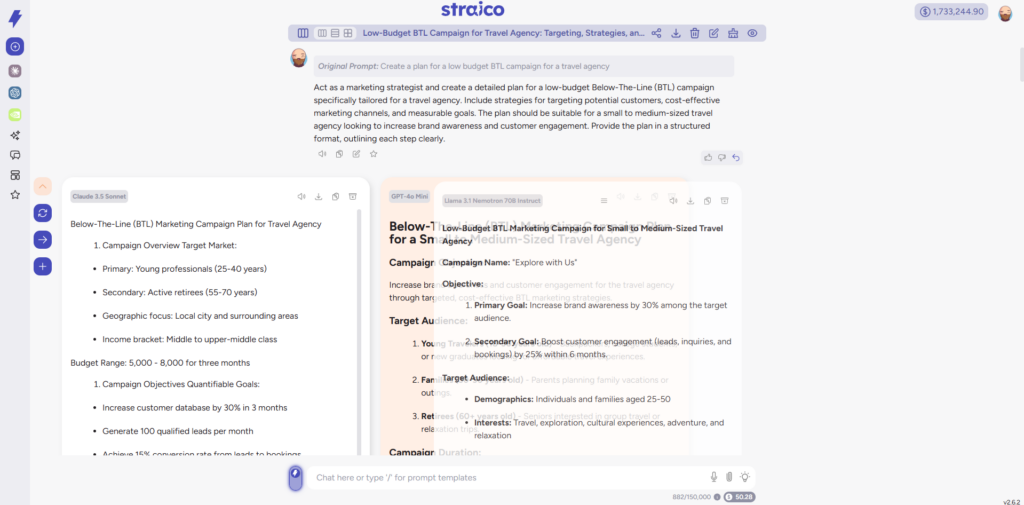
- Drag and Drop Columns: Customizing your workspace has never been easier. Rearrange the order of active AI model columns to prioritize your favorites or organize them by name — the choice is yours!
- Activating Smart Merge: Simply drag one column and drop it on top of another. The lower column will highlight in orange, signaling that Smart Merge mode is now active.
Step-by-Step Guide to Using Smart Merge
Step 1: Drag and Drop to Activate Smart Merge
Drag a column with a model response on top of another to activate the Smart Merge mode. The bottom will be highlighted with an orange background so you know it’s going to activate it when you release it.
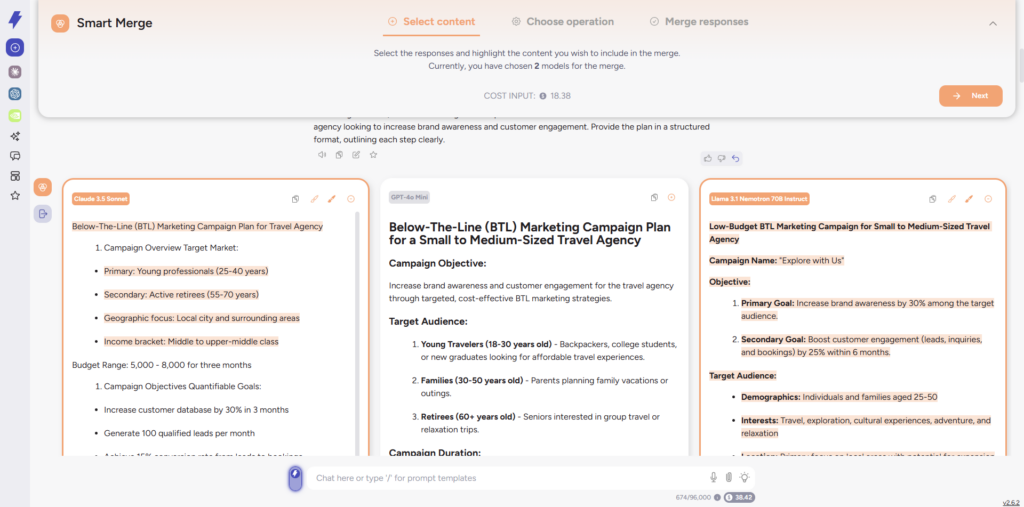
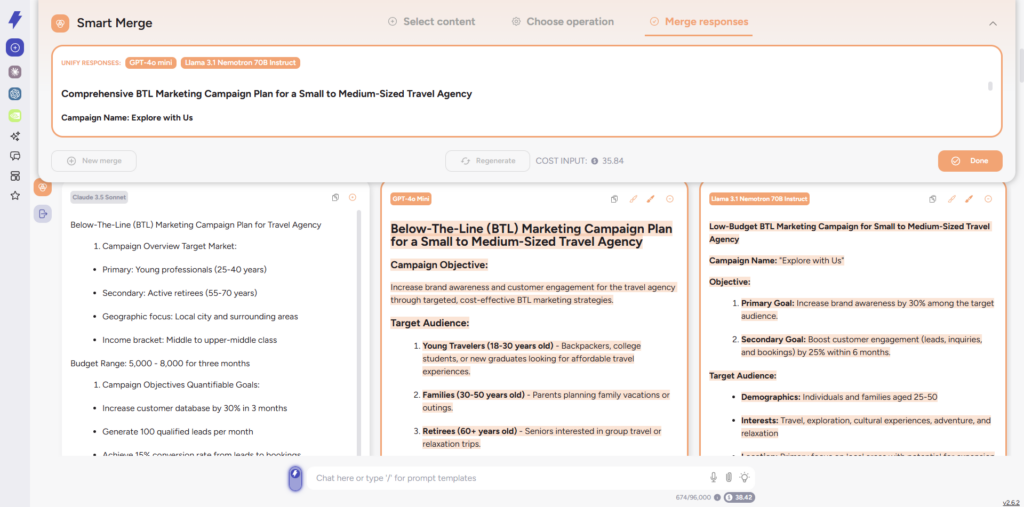
Step 2: Select Content
With Smart Merge activated, you can choose to select all messages from the AI models or handpick specific phrases. Highlight the text you wish to merge. If you accidentally select more than you intended, simply highlight it again to deselect it.
Keep an eye on the orange border and highlight that indicate which models are included in the merge. You’ll also see a cost estimate for the merge operation displayed at the top of your screen, helping you manage your resources effectively.
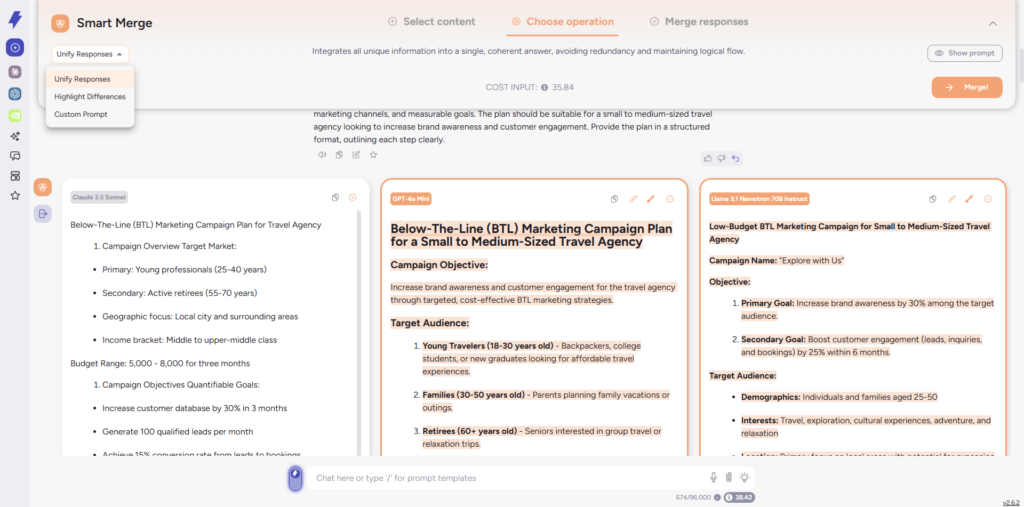
Step 2: Choose Operation
Next, decide what type of Smart Merge to perform based on your needs:
- Unify Responses: This option integrates unique information from the selected models into a single, coherent answer, reducing redundancy while maintaining a logical flow.
- Highlight Differences: If you’re interested in contrasts, this choice succinctly summarizes the unique points and key differences across the responses.
- Custom Prompt: Want more control? Customize your merge instruction by modifying the prompt and selecting the model to execute the operation.
Step 3: Merge Responses
Once you’ve made your selections, click the Merge! button. You will get a preview of the result of the operation. You can create a New merge, regenerate it, or click Done to finish up the process.
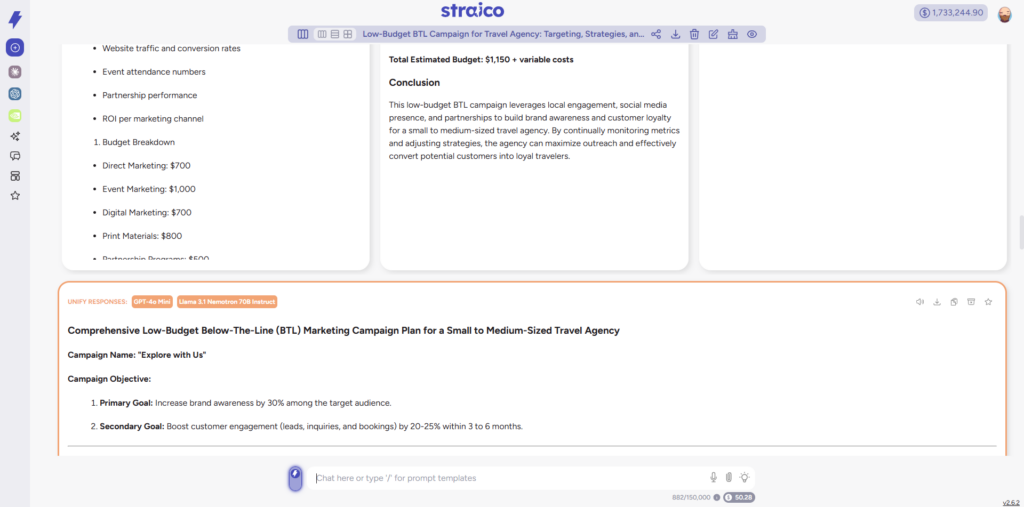
A newly generated response will appear below the side-by-side model answers, ready to serve as context for your follow-up messages. Continue your chat as usual while enjoying all other functionalities that Straico provides.
Want to read the entire chat used in this tutorial? You can do that, clicking here.
The Smart Merge feature is a game-changer for users looking to enhance their AI interactions, delivering the ability to create cohesive and targeted responses efficiently. By integrating Smart Merge into your workflow, you can optimize your use of Straico, achieving better results and maximized potential from your generative AI tools. Experiment with these new functionalities to discover a new level of productivity!